
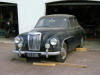
MG Magnette V8
2007 started with the beginning of some final assembly, such as the rear end, front suspension and steering, but still with a lot to do - especially for me. The engine could be installed just as soon as it had been freshened, but it had already been 2 months since it was delivered, ditto the carbs... The court case regarding the damaged Performance wheels was still to be heard and I was still struggling with wiper motor wiring!
The underside of the car had been painted and it was now time to apply a primer and a light skim of filler to the bodyshell, ready for final painting - and I needed to get the doors tidied up.
My job list was growing no shorter and a lot of hours were to be spent on the dashboard and also the fibreglass replacement panels, so there was still not an imminent or even a target completion date. Just as an overview:

It should stop and steer well... (how wrong can you be?)

There would be boot storage...
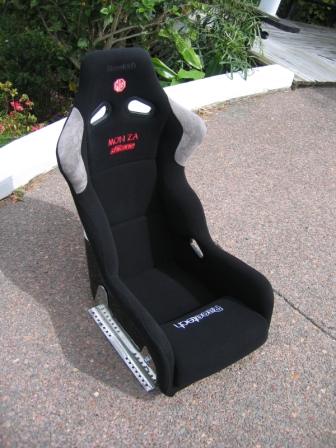
A comfortable seat...

5 Gears rather than 4...

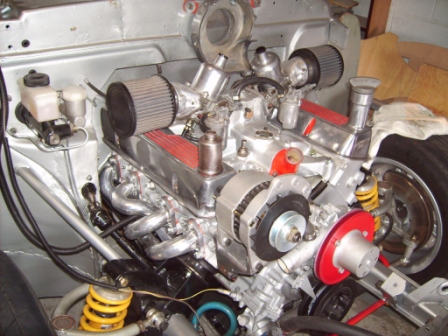
3500cc rather than 1600cc...
And an empty bank account and yet more white hairs... but, lots of fun!
With the car the right way up, a coat of primer on the main body and interior and a two pack coat of paint on the underside, the stage was set for some work to be completed rather than mock ups. However, the money pot was finally down to empty so the order was given to slow down. Needless to say, the overall costs to date could have paid for a second-hand TVR or even a brand new semi luxury car! That is the penalty you pay when you don't have the skills or the knowledge.
JANUARY 2007
Farnie still had a couple of jobs to do that I had overlooked  such as a solid rear parcel shelf to make a fireproof bulkhead and a couple of fixings for occasional rear seat belts, plus the fixings for the front belts.
The original parcel shelf had too many cut outs so a thin steel covering was the best option, especially as the fuel tank is now much larger than before and sits
just underneath. The rear seat access - certainly from the left is quite easy and the picture shows that the roll bar isn't too intrusive, but will need
padding of course.
such as a solid rear parcel shelf to make a fireproof bulkhead and a couple of fixings for occasional rear seat belts, plus the fixings for the front belts.
The original parcel shelf had too many cut outs so a thin steel covering was the best option, especially as the fuel tank is now much larger than before and sits
just underneath. The rear seat access - certainly from the left is quite easy and the picture shows that the roll bar isn't too intrusive, but will need
padding of course.
Meanwhile, there was a massive amount for me to do and much of the urgent stuff revolved around preparing and painting various items of bracketry and running gear. The rear axle and springs were painted with POR15 silver primer then a coat of blackcote on most of it and a coat of clear varnish on the dif cover. POR15 is not normally UV resistant and the silver changes quite quickly to a yellowish tinge. I had no idea whether or not a coat of clear over the dif cover would last... Farnie had checked the dif and pronounced it in good condition so he attached the springs to the axle. I had even polished up the U bolts and given them a coat of clear varnish, in the hope that they wouldn't look tatty or rusty after a matter of days... Home then with a pile of bits to paint, including various brake brackets, the front hubs, the pedal assembly, engine mounts etc.

 The
main colours chosen for the car were always going to be black, silver and red, so apart from the bright yellow front shocks and springs, (which couldn't
be painted until they were are proved to be correct), I
set to with POR15 primer, being careful to wear rubber gloves. That stuff really does set like concrete and can take weeks to get off bare skin.
The pedal box received a coat of ordinary primer on the top of the POR silver before spraying with a can of ordinary red enamel. This may or may not be
durable, (I hadn't got any two pot paint at that time...) but as it is inside the car, should be OK and the hot January sun meant that it dried to a good
gloss quite quickly.
The
main colours chosen for the car were always going to be black, silver and red, so apart from the bright yellow front shocks and springs, (which couldn't
be painted until they were are proved to be correct), I
set to with POR15 primer, being careful to wear rubber gloves. That stuff really does set like concrete and can take weeks to get off bare skin.
The pedal box received a coat of ordinary primer on the top of the POR silver before spraying with a can of ordinary red enamel. This may or may not be
durable, (I hadn't got any two pot paint at that time...) but as it is inside the car, should be OK and the hot January sun meant that it dried to a good
gloss quite quickly.
 I drilled a small lubrication hole in the accelerator pedal holding tube, then oiled it, as I felt that it would
offer a much smoother operation - and I have a bit of a fetish for clean oil and
grease and I do like a smooth throttle action! Whilst checking out one or two non essential items, we found that there was
enough wiring for the CD changer to be located in the boot, even though the original plan had been to mount it under the front passenger seat. It
could be mounted either in a rear wing or maybe even under the parcel shelf, but above the tank. The Pioneer CD system had been installed in our first Land
Rover Freelander, and removed when it was sold, as the replacement model came with a 6 CD system. Seemed silly to let it go, especially as the trade in
price was so low.
I drilled a small lubrication hole in the accelerator pedal holding tube, then oiled it, as I felt that it would
offer a much smoother operation - and I have a bit of a fetish for clean oil and
grease and I do like a smooth throttle action! Whilst checking out one or two non essential items, we found that there was
enough wiring for the CD changer to be located in the boot, even though the original plan had been to mount it under the front passenger seat. It
could be mounted either in a rear wing or maybe even under the parcel shelf, but above the tank. The Pioneer CD system had been installed in our first Land
Rover Freelander, and removed when it was sold, as the replacement model came with a 6 CD system. Seemed silly to let it go, especially as the trade in
price was so low.
 I spent an afternoon on the centre dashboard, drilling holes for supplementary instruments and working out how to attach the radio head unit. Very
pleased with my progress, I took the panel down to Farnie's workshop, to find that the back of the radio was positioned exactly where the roll cage goes under the
dash... back to the drawing board.
I spent an afternoon on the centre dashboard, drilling holes for supplementary instruments and working out how to attach the radio head unit. Very
pleased with my progress, I took the panel down to Farnie's workshop, to find that the back of the radio was positioned exactly where the roll cage goes under the
dash... back to the drawing board.
If I were to redo the dashboard (which I may well do), I would probably make up the complete dashboard in one go, rather than piecemeal as I did it this time. Much of what I did was 'design and build', rather than 'design THEN build'. The fit overall is probably not as good as it could be but as with anything, the first is the trickiest and the second is better but also quicker and cheaper.